How to Use a Cricut Explore Air 2: Create Your First Project
Hey crafters! In this blog, I came up with an exciting project tutorial on how to use a Cricut Explore Air 2. Recently, I made beautiful earrings for myself. Do you know what materials I used for creating these earrings? It’s nothing but faux leather! Yes, now you can also make jewelry from leather. And I will teach you how to make this elegant jewelry for your loved ones or yourself.
Despite these, I will also teach you how to set up a Cricut Explore Air 2, and then we will move on to making earrings on the Cricut machine. The best thing about creating these earrings yourself is that you will not have to waste dollars on buying them from the market. Definitely, you are going to save a lot! So, let’s start with the setup process first, and then we will gather some supplies for making this stunning project. Are you ready to get started? Let’s get started!
How to Set up a Cricut Explore Air 2 on a Device?
Have you just bought your Explore Air 2? Yet, you haven’t set it up? Don’t worry, I’ve got your back. Before you learn how to use a Cricut Explore Air 2, you need to set up your cutting machine. For this, you have to follow the instructions given below. These instructions are for both Windows and Mac computers:
- First, you need to connect your Cricut machine to the power source.
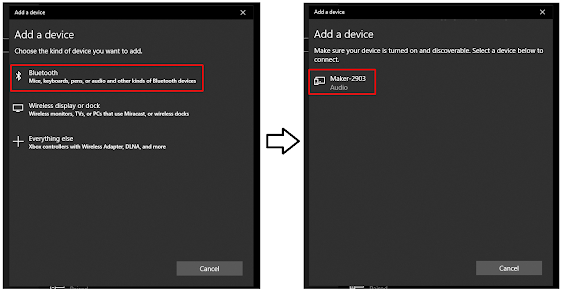
- Then, you need to establish a connection between your computer and machine by means of USB or Bluetooth.
- On your browser, you have to visit Cricut’s site: design.cricut.com/setup.
- On Cricut’s site, you will have to download and install the Design Space app. Without this app, your setup will be incomplete. Hence, it is a must-have software.
- Once you have installed the software, you should follow the given instructions displayed on your screen to create your Cricut ID and set up your machine.
- After a while, you will notice your setup is complete.
- Finally, your machine is ready to cut anything.
Now we have set up our machine with our computer, let’s move on to gather some essential supplies in the next section.
What Materials Will You Need for Making Leather Earrings?
Before you know how to use a Cricut Explore Air 2, you need to gather the following items:
- A thin piece of Faux suede
- Cricut deep cutting (optional)
- Earring hooks
- Jump rings
- A pair of small pliers
In case you don’t know, the earring hooks are the piece that is put into your ear. The jump rings are small circular pieces that are used to attach the earring hooks to the leather earring. Also, I chose a golden color for hooks and rings as I love this color. However, you are free to choose as per your personal style.
How to Use a Cricut Explore Air 2?
Now, let’s create a design for earrings on Cricut Design Space. As you can see below, I have created this very simple design. This is simple and easy to create. Also, you can add an earring design from the Cricut app. For this, you need to navigate to Canvas > Projects and then search for Earrings. From the given results, you have to select one design and start modifying it as per your needs.

Now, go to your Cricut machine and set its dial to Custom, as shown in the picture below.

Doing this will prompt less common materials settings in your Design Space, and hence, you will be able to choose the right materials for your earrings.

Afterward, you need to hit the Make It button, and then the Cricut software will redirect you to another screen where you can choose the materials you will cut on your Explore. So, click on Browse Your Materials, and then you will see a pop-up window. Here, you need to scroll down until you find Faux Suede. Select this material, and you will get back to the original screen.
After this, you have to place your material on the mat. As you can see in the picture below, I have used blue painter’s tape because my material is thicker.

This tape helps prevent the material from sliding. Therefore, you have to arrange your design accordingly. Otherwise, you will end up cutting your design on the tape. Next, you can load the material into the machine, and it will cut your design within a minute. After cutting, you can take out the cut pieces carefully using the weeding tools. Carefully weed out the center part of the earring using Cricut tweezers or a weeding tool.

Finally, attach the hooks and jump rings, and it is ready!

Conclusion
Finally, I have taught you the complete setup process, including how to use a Cricut Explore Air 2 using a simple leather earring project. I chose this project because it is simple and will be helpful for beginners. At the same time, you will learn to create a design on Cricut Design Space and cut it on your trusty Cricut Explore Air 2. I would suggest you place the design correctly on the Cricut software to cut it on the materials.
FAQs
Question 1: How to use a pen in Cricut Explore Air 2?
Answer: By using a pen with Explore Air 2, you can transform your Cricut projects to the next level. Here’s how to use the pen in the Explore Air 2 cutting machine:
- When you are done with your design on Design Space, you need to select the materials.
- Then, browse all materials and choose the Copy Paper.
- Next, change the Smart Set Dial to Custom first.
- Afterward, insert an Infusible Ink pen into a Clamp A, then press the Go button.
Question 2: Can I use Smart Materials with my Cricut Explore Air 2?
Answer: Cricut has developed the Cricut Maker and Explore 3, which works with Smart Material, meaning you don’t need to use a cutting mat. Smart Materials are not made for use with the older version of Cricut Explore or Maker machines. In case you use the older Cricut machines, such as Explore Air 2 with Smart Materials, then it may cause material jams and give inaccurate results. In short, you can’t use Smart Materials with Explore Air.
Question 3: Does the Cricut Explore Air 2 machine support fast mode?
Answer: The latest Explore 3 model does support the fast mode for cutting and writing with a particular material. However, it can cut faster without the mat when used with Smart Material. Besides, Cricut Explore Air 2 has a fast mode for both cutting and writing when you use it in vinyl, cardstock, and iron-on settings.
Source URL: - HOW TO USE A CRICUT EXPLORE AIR 2
Visit - HOW TO USE A CRICUT MACHINE


Comments
Post a Comment