How to Set up Cricut Mug Press: A Guide for Iron-on Projects
Are
you here to learn how to set up Cricut
Mug Press? If so, you are in the right place. Ever since I got my first
Cricut heat press, my experience has always been fun. Creating custom mugs for
my friends and family members was a thrilling experience. Earlier, I used to
buy these mugs from the shop, but making them personalized according to my
choice took time and effort.
I
decided to create customized mugs. Let’s get started with this blog, where I
will share everything that you need to know about the Cricut Mug Press set up. I hope you have unboxed your new Cricut
machine because the next step is to set it up after unboxing. So, let’s get
started now!
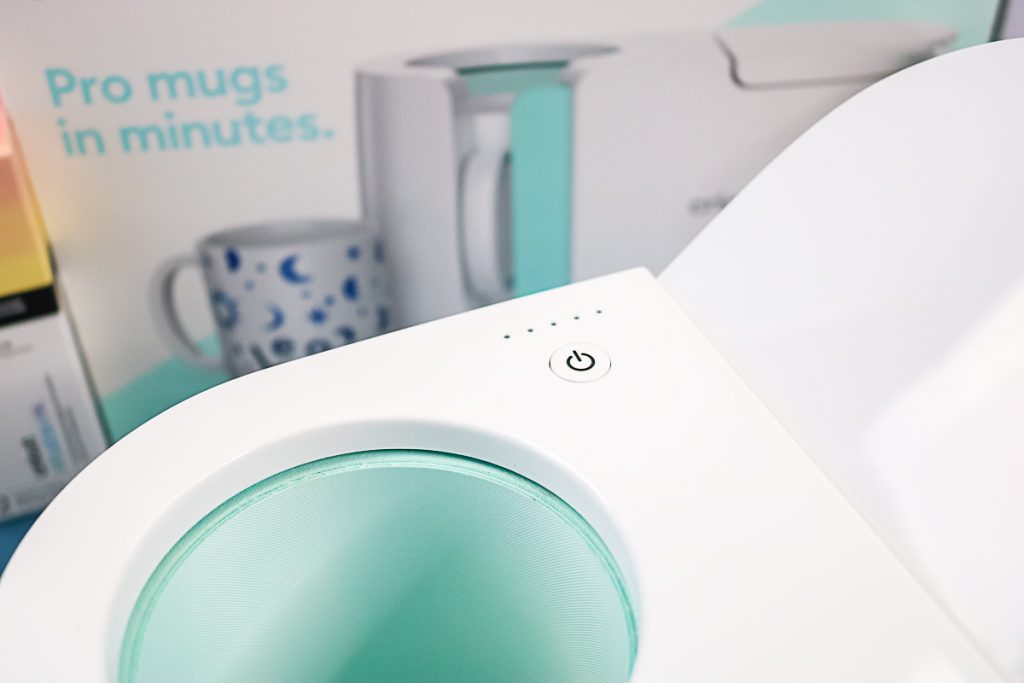
What Do All the
Buttons and Colors Mean in Cricut Mug Press?
If
you had seen a Cricut Mug Press, you might have seen some buttons and other
different colors of light available on it. Do you know what they all mean and
what they do? Perhaps not! Let’s understand their meaning first before learning
how to set up Cricut Mug Press.
Well,
that’s completely fine, even though there was a time when I was at your place.
So, there’s nothing to worry about. Below, I am explaining the meaning of every
button, including the color of your machine. So, if you see:
- NO Light, it means it is on Standby Mode.
- Orange flashing usually means you are in Connect Mode.
- Solid orange indicates that the press machine is in Heat
Mode.
- Solid red means error detection.
You
will also see an LED progress bar just above the power button. It indicates your project’s progress, also called
Track Transfer progress. A single LED will light up when you press the mug, and
all the LEDs will light up when you are closer to the project completion,
meaning your project is ready.

Now
that you have learned about the meaning of buttons and the different colors
present on the press machine, you should move on to the following steps, where
I will explain everything about the Cricut
Mug Press set up.
How to Set up Cricut
Mug Press: 4 Easy-To-Follow Steps
When
setting up the Cricut machine, you should know that there is no one thing we
do. This single step includes various steps, such as setting up the time and
temperature, activating the machine, and downloading the Cricut software. Let’s
dive into it stepwise.
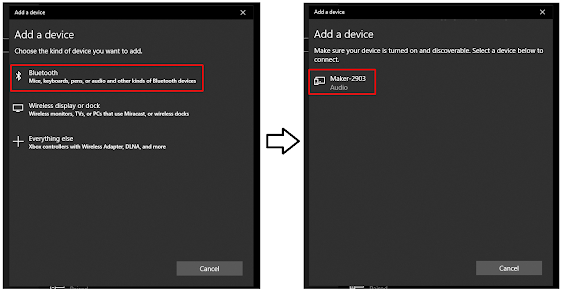
Step 1: Establishing
a Connection
When
you get your Cricut machine, connect it via a USB cord. You need to connect
your USB cable to your PC and then to your machine. This step is necessary for
setting up and downloading any updates that Cricut releases for your press.
Once you are connected, you will need to move on to the next step.
Step 2: Downloading
the Cricut Software
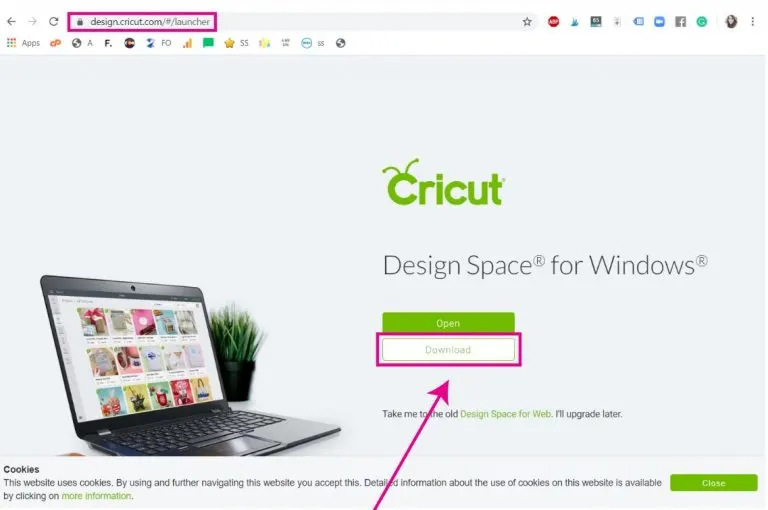
Make
sure you have an internet connection and computer for this setup. Once ensured,
you need to follow the steps below to download Cricut Design Space on your
Windows PC:
- Open a browser on your PC and go to the URL design.cricut.com.
- On the next screen, you will have to accept Cricut’s Terms of Use and Privacy
Policy. To take this, click on the small checkbox.
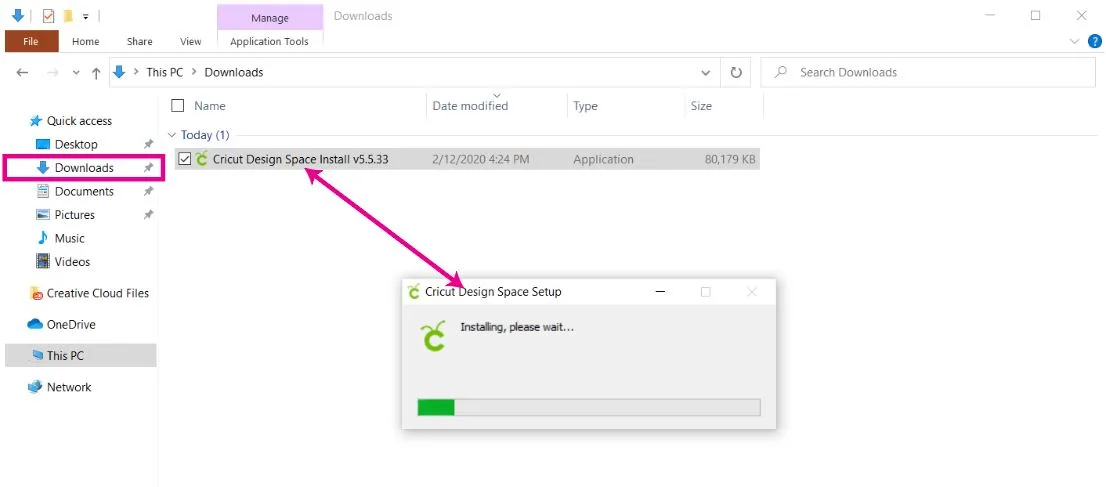
- Now, you will have to hit the Download button to start downloading the app.

- Once you’ve done this, you need to open the downloaded file
by double-clicking on it. (You can find the downloaded file in your Downloads folder.)
- Afterward, you should wait and let it install.

- Once the application is installed, open it and move to the
third step to learn how to set up
Cricut Mug Press.
Step 3: Sign Into
Your Cricut Account
If
you haven’t created your Cricut ID yet, you need to create one. However, if you
already have one, you need to sign in and proceed to the fourth step. Here’s
how to create an account:
- To get started, open a Cricut Design Space.
- Then, you need to click on the Sign In.
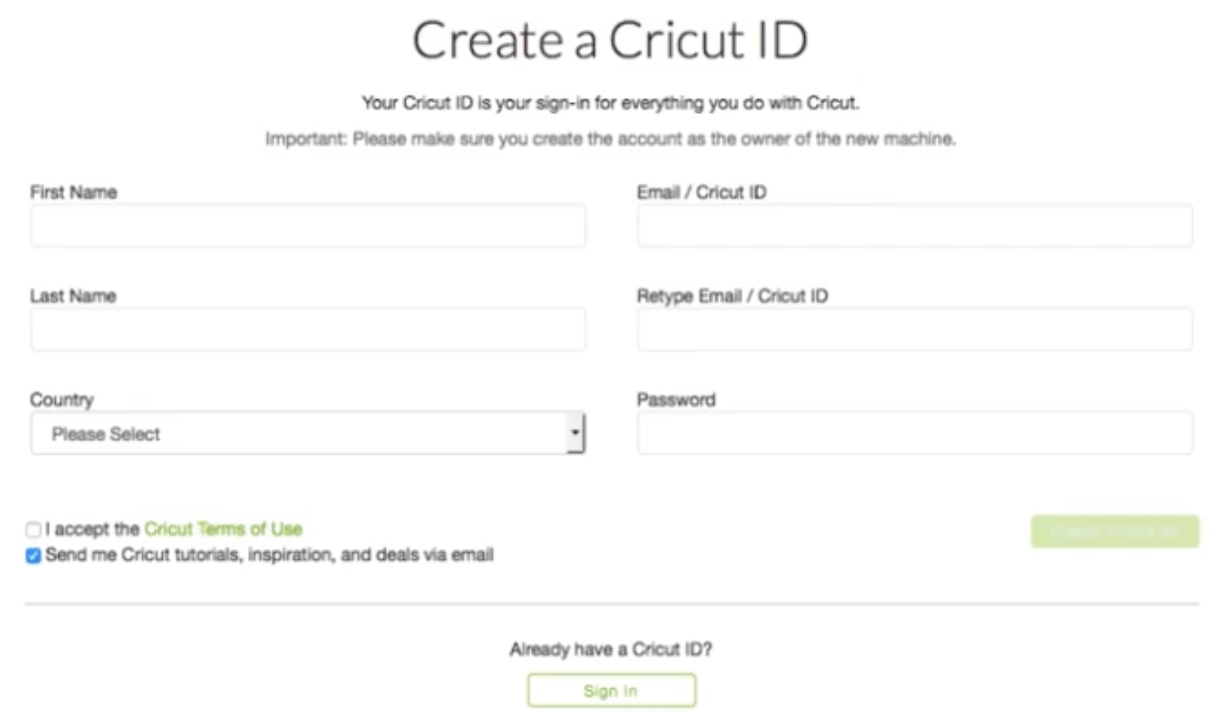
- On the next page, you will have to choose Create a Cricut ID.
- Next, fill out whatever it asks you to do, such as your email ID, password, name, country, and
phone number.

- After filling in all the requisite details, you will be
asked to select two checkboxes to receive product discounts, ideas, and
newsletters. Choose what works best for you.
- Finally, click a checkbox to accept Cricut’s Terms of Use and Policy, then hit Create Cricut ID.
Finally,
you have created your Cricut account. Now, let’s move to the next step:
learning how to set up Cricut Mug Press.
Step 4: Activating
Cricut Mug Press
- Again, open your Cricut Design Space app and sign in to
your account.
- Next, you will see a Welcome to Cricut Setup page screen.
Here, you have to choose Heat Press
> Cricut Mug Press.
- After that, you will have to follow the simple steps
displayed on your screen.
- Then, check for the firmware and finish activating it.
- Now, hit the Get
Started tab after completing your activation process.
That’s
all in the Cricut machine setup. Have a good crafting!
FAQs
Question 1: How to
register my Cricut Mug Press?
Answer: Users often worry
about the Cricut Mug Press registration. But they should know that it is
automatically registered when you activate it. As you go through the steps I
have explained above, you will find that you are registering your product while
activating it. There are no other steps for registering it.
Question 2: Which
app do I need to download for Cricut Mug Press?
Answer: Cricut Design Space
is the same software we use for all Cricut machines and heat press models.
There is no other application for your machine, but the software helps design
and set up your machine. You will also need to update your press using this
same software.
Question 3: Why
can’t I set up my Cricut Mug Press?
Answer: It might be because
you are using your Cricut press machine for the first time. This issue is
normal; your press might be waiting for you to complete the activation process
at cricut. It can also happen when
you have pressed and held the power button for over 5 seconds.

Comments
Post a Comment